Running Ethernet cables outside may seem daunting, but with the right approach and materials, it can be a straightforward task. Whether you’re looking to extend your home network to an outbuilding, set up an outdoor security system, or simply boost your internet connection in your backyard, this guide will walk you through each step. Ensuring that your cables are installed properly will not only enhance your network’s performance but also increase its longevity.
Why Run Ethernet Cables Outside?
Expanding your network outside your home or office can provide numerous benefits. A wired connection offers greater reliability and speed compared to wireless solutions, particularly over long distances. Whether you’re connecting to an outdoor office, a garage, or even setting up a Wi-Fi access point, running an Ethernet cable outside ensures a stable and fast connection.
Selecting the Right Type of Ethernet Cable
Before you start, it’s essential to choose the correct type of Ethernet cable for outdoor use. Not all cables are created equal, and using the wrong type can lead to poor performance or even damage over time.
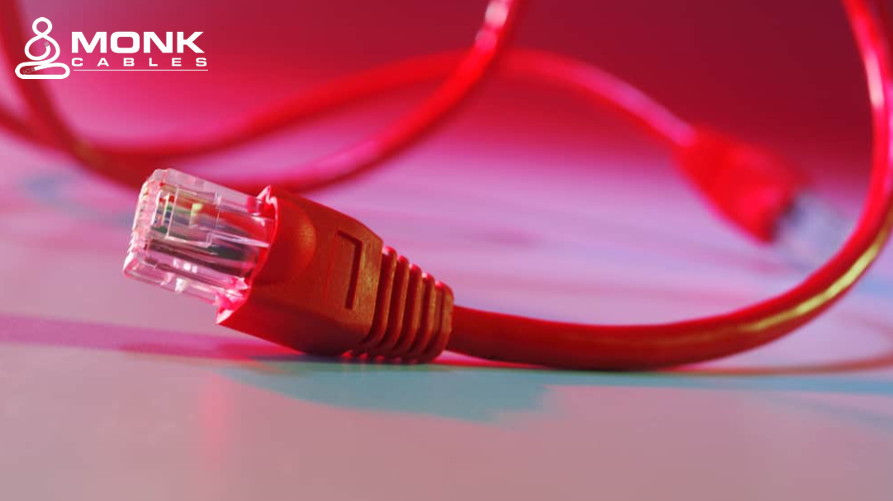
Cat6 Cable: A popular choice for most outdoor installations due to its capability to handle speeds up to 10Gbps over short distances. It’s ideal for residential and commercial setups.
Cat6 Plenum Cable: Specifically designed for installation in plenum spaces, these cables are made from materials that resist fire. While they are typically used indoors, they can also be used outdoors if they are housed within a protective conduit.
Cat6 Plenum 1000ft: For larger projects where you need to cover significant distances, investing in a bulk roll of Cat6 Plenum 1000ft is a smart choice. This gives you flexibility and ensures you won’t run short of cable during the installation.
Step 1: Plan Your Route
The first step in running Ethernet cables outside is planning the route. This involves determining where the cable will start and end, and identifying any obstacles that may be in the way.
Evaluate the Distance: Measure the distance between your starting point and the endpoint. Ensure that the total length doesn’t exceed the maximum distance for Ethernet cables, which is typically 328 feet (100 meters) for Cat6 cables.
Identify Obstacles: Check for any potential obstacles such as walls, fences, or trees that might interfere with the cable’s path. You’ll need to plan around these or decide if you’ll need to drill through walls or bury the cable.
Consider the Environment: If the cable will be exposed to direct sunlight, extreme temperatures, or moisture, you’ll need to select a cable that is rated for outdoor use. Cat6 Solid Copper cables are often used for outdoor installations due to their durability and resistance to the elements.
Step 2: Gather the Necessary Tools and Materials
Having the right tools and materials on hand will make the installation process smoother and more efficient. Here’s what you’ll need:
Ethernet Cable: Depending on your needs, you might use Cat6 Cable, Cat6 Plenum, or Cat6 Plenum 1000ft for the installation.
Conduit: To protect the cable from physical damage and environmental factors, it’s recommended to run it through a conduit. PVC conduit is a popular choice for outdoor installations.
Cable Ties: These will help you secure the cable along the route.
Drill: If you need to go through walls or other obstacles, a drill will be necessary.
Fish Tape: Useful for guiding the cable through conduit or tight spaces.
Weatherproof Junction Boxes: If you need to connect different sections of cable or terminate the cable outside, these boxes will protect the connections from the elements.
Coaxial Cables: If your setup requires it, you might also need coaxial cables, especially if you’re integrating the Ethernet connection with a satellite or cable TV system.
Step 3: Install Conduit (If Necessary)
Running Ethernet cable directly outside without protection can lead to damage over time due to environmental exposure. Installing a conduit is a crucial step if you want to ensure the longevity and performance of your network.
Measure and Cut the Conduit: Measure the length of the route and cut the conduit accordingly. It’s better to cut slightly longer sections and trim them as needed.
Lay Out the Conduit: Before securing it, lay out the conduit along the route to ensure everything fits as planned.
Secure the Conduit: Use conduit clips or brackets to secure the conduit to walls or along the ground. Ensure that it’s fastened firmly and won’t move.
Feed the Cable Through: Once the conduit is in place, use fish tape to pull the Ethernet cable through the conduit. This might require some patience, especially if there are bends in the conduit.
Step 4: Run the Cable
Now that your route is planned and the conduit is in place, it’s time to run the cable.
Start from the Source: Begin by connecting the Ethernet cable to your network source, such as a router or switch. Ensure that you leave enough slack at both ends to make the connections easier.
Route the Cable: Gently pull the cable through the conduit, ensuring that it doesn’t kink or get damaged. If you’re running the cable along walls or other surfaces, use cable ties to secure it in place.
Avoid Sharp Bends: Ethernet cables can be sensitive to sharp bends, which can degrade the signal quality. Ensure that any bends in the cable are gentle and within the recommended bend radius.
Test the Connection: Before making the final connections, it’s a good idea to test the cable to ensure there are no faults or issues. You can use a cable tester to check for continuity and signal integrity.
Step 5: Connect and Secure the Cable
With the cable in place, it’s time to make the final connections and secure everything.
Terminate the Cable: If you haven’t already, terminate the ends of the cable with RJ45 connectors. If you’re unsure how to do this, there are many tutorials available online that provide step-by-step instructions.
Connect to Devices: Plug one end of the cable into your network source and the other end into the device you’re connecting. This could be a computer, Wi-Fi access point, or any other network-enabled device.
Secure Connections: If the connections are outside, use weatherproof junction boxes to protect them from the elements. Ensure that all connections are tight and secure.
Step 6: Perform a Final Test
After everything is connected, it’s time to test your installation.
Check for Connectivity: Ensure that the connected device is receiving a network signal. You should see activity lights on both the network source and the device.
Test the Speed: Run a speed test to ensure that the cable is delivering the expected performance. Cat6 cables should provide high-speed connectivity without significant signal loss over the distances typically used in residential and commercial installations.
Inspect the Installation: Finally, inspect the entire installation to ensure that the cable is secure and protected from potential damage. Look for any loose connections or exposed sections of cable.
Conclusion
Running Ethernet cables outside doesn’t have to be a complex task. By following these steps and using the right materials, you can extend your network to outdoor areas with ease. Whether you’re using Cat6 Cable, Cat6 Plenum, or Cat6 Solid Copper cables, ensuring that your installation is done correctly will provide you with reliable, high-speed internet access wherever you need it.
Remember to plan your route carefully, use conduit for protection, and test your connections to avoid any issues down the line. With this guide, you’ll be able to enjoy a seamless network connection both inside and outside your home or office.
For large projects, consider purchasing bulk Cat6 Plenum 1000ft to ensure you have enough cable to complete the job. This not only saves money but also provides you with the flexibility to run cables wherever they are needed without worrying about running short. Whether you are a DIY enthusiast or a professional installer, following these steps will help you achieve a successful outdoor Ethernet cable installation.
Running Ethernet cables outside can significantly enhance your network’s reach and reliability. By using high-quality cables such as Cat6 Pure Copper Cable and protecting them with the appropriate conduit and weatherproofing, you can ensure that your network performs optimally in any outdoor environment.

MILTON Comet 1000 Single Wall Stainless Steel Water Bottle 1000ml for School, Office, Home, Gym, Leakproof, Rust free, Black
₹298.00 (as of 11 March, 2025 11:37 GMT +05:30 - More infoProduct prices and availability are accurate as of the date/time indicated and are subject to change. Any price and availability information displayed on [relevant Amazon Site(s), as applicable] at the time of purchase will apply to the purchase of this product.)
VISBY INDIA 2 L Capacity Belt Straw Transparent Motivational Water Bottles|Time Marker Leak Proof&Break-Proof|Best Usage For Office/School/Gym/Travel Bottle|Bpa-Free Fitness Sports Bottle (Green)
₹169.00 (as of 11 March, 2025 11:42 GMT +05:30 - More infoProduct prices and availability are accurate as of the date/time indicated and are subject to change. Any price and availability information displayed on [relevant Amazon Site(s), as applicable] at the time of purchase will apply to the purchase of this product.)
Milton Aura 1000 Thermosteel Bottle, 1050 ml Water Bottles, 24 Hours Hot and Cold, Easy to Carry, Easy Grip, Rust Proof, Tea, Coffee, Office, Travel Bottle, Black
₹932.00 (as of 11 March, 2025 11:37 GMT +05:30 - More infoProduct prices and availability are accurate as of the date/time indicated and are subject to change. Any price and availability information displayed on [relevant Amazon Site(s), as applicable] at the time of purchase will apply to the purchase of this product.)
Pigeon Polypropylene Mini Handy and Compact Chopper with 3 Blades for Effortlessly Chopping Vegetables and Fruits for Your Kitchen (12420, Green, 400 ml)
₹174.00 (as of 11 March, 2025 11:37 GMT +05:30 - More infoProduct prices and availability are accurate as of the date/time indicated and are subject to change. Any price and availability information displayed on [relevant Amazon Site(s), as applicable] at the time of purchase will apply to the purchase of this product.)
UPRONex21 Portable Mini Sealing Machine | Handheld Packet Sealer for Food, Snacks, Chips, Fresh Storage | Seals Plastic Bags | Compact Heat Sealer | Ideal for Kitchen | Multicolor
₹199.00 (as of 11 March, 2025 11:42 GMT +05:30 - More infoProduct prices and availability are accurate as of the date/time indicated and are subject to change. Any price and availability information displayed on [relevant Amazon Site(s), as applicable] at the time of purchase will apply to the purchase of this product.)Discover more from The General Post
Subscribe to get the latest posts sent to your email.