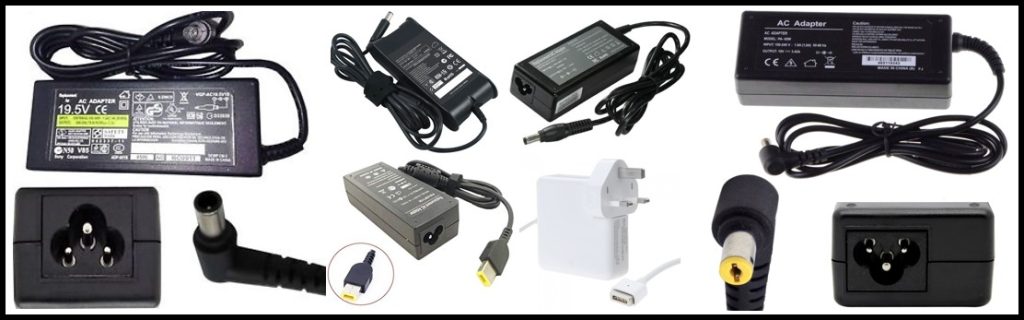
Laptop chargers are like the lifelines of your device. Without them, your laptop’s a fancy paperweight! But what happens when that charger pin gets bent, broken, or stops working? There are some steps to follow to repair laptop charger pin below are the steps. It’s time to learn how to make your charger work again if you noticed that it does not light up anymore. After years of tossing laptop power cords in bags, many fray from dirt. They also get tangled and tripped over. The fraying cord will break apart, causing your laptop to lose power. Here’s how to rescue your power cord from the landfill and save yourself a few bucks along the way!
Signs Your Charger Pin Needs Fixing
You might wonder, “How do I know if my charger pin is the problem?” Here are some telltale signs:
Loose Connection: If the charger feels wobbly in the port, that could be a sign of trouble.
Interruption in Charging: Does your battery keep jumping between charging and not charging? That’s a red flag.
Visible Damage: Look closely! If the pin is bent or broken, it’s time to take action.
Recognizing these signs early can save you from laptop drama later.
Gather Your Tools
Before jumping into the fix, get your tools ready. You’ll need:
Small Screwdriver: For opening any casing if required.
Pliers: Perfect for bending things back into shape.
Soldering Iron: If your pin is completely out of commission, you may need to reattach it.
Electrical Tape: For a snug and safe finishing touch.
With these tools in hand, you’re ready to tackle the issue!
Assess the Damage
Take a good look at the charger pin. Is it just bent? That’s easier to fix. If it’s broken off, you might need to get a little more hands-on. Remember, the goal is to restore that connection so your laptop can drink up all the power it needs.
Fixing a Bent Charger Pin
Gently Bend It Back: Use pliers to carefully straighten the pin. This part requires a steady hand—don’t force it!
Check Alignment: After bending, make sure it aligns with the charger port. It should fit snugly.
Test It: Plug it in and see if it charges. If yes, you’ve done it!
Repairing a Broken Pin
If your pin came off completely, fear not! Here’s how to reattach it:
Heat Up the Soldering Iron: Make sure it’s hot enough to melt solder but not too hot to burn everything around it.
Place the Pin: Position the broken end back onto the charger.
Solder It Down: Melt some solder to hold the pin in place. Make sure it’s solid!
Let It Cool: Wait for it to harden; then check if it’s secure.
Wrapping Things Up
Once you’ve managed to fix the pin, wrap it up with some electrical tape. This step acts like a safety net. It keeps everything secure and protects it from future damage.
Know When to Replace
Sometimes fixing a charger pin isn’t enough. If your charger looks worn out or is still acting up, it might be better to invest in a new one. Remember, a reliable charger is the key to a working laptop!
Overview
Repairing your laptop charger pin isn’t rocket science. You don’t have to spend more money to repair your charger because with simple tools and much time you can as well repair it. Watch for those signs and do not sit back waiting for them to tell you something is wrong. Your laptop and your pocketbook will be grateful.

Wakefit 100% Waterproof Premium Cotton Mattress Protector | Breathable and Hypoallergenic Ultra Soft Fitted Bed Protector 78"x72" - King, Grey
₹1,048.00 (as of 23 December, 2024 11:23 GMT +05:30 - More infoProduct prices and availability are accurate as of the date/time indicated and are subject to change. Any price and availability information displayed on [relevant Amazon Site(s), as applicable] at the time of purchase will apply to the purchase of this product.)
nutripro Copper Juicer Mixer Grinder - Smoothie Maker - 500 Watts (3 Jars, Silver) - 2 Year Warranty
₹1,799.00 (as of 23 December, 2024 11:23 GMT +05:30 - More infoProduct prices and availability are accurate as of the date/time indicated and are subject to change. Any price and availability information displayed on [relevant Amazon Site(s), as applicable] at the time of purchase will apply to the purchase of this product.)
Ezee Black Garbage Bags for Dustbin | 90 Pcs | Medium 19 X 21 Inches | 30 Pcs x Pack of 3
₹159.00 (as of 23 December, 2024 11:23 GMT +05:30 - More infoProduct prices and availability are accurate as of the date/time indicated and are subject to change. Any price and availability information displayed on [relevant Amazon Site(s), as applicable] at the time of purchase will apply to the purchase of this product.)
Havells Instanio 3L Instant Water Heater(Geyser)| Temp. Sensing LED Indicator| Rust & Shock Proof Body| ISI Marked|With Flexible Pipes|Warranty: 5 year on Inner Tank| High Rise Compatible (White Blue)
₹3,650.00 (as of 23 December, 2024 11:23 GMT +05:30 - More infoProduct prices and availability are accurate as of the date/time indicated and are subject to change. Any price and availability information displayed on [relevant Amazon Site(s), as applicable] at the time of purchase will apply to the purchase of this product.)
Crompton Galaxy Decoration Copper USB Powered String Fairy Lights with 100 Led Light (10 Meters / 32 Feet, Warm White, Pack of 1)
₹139.00 (as of 23 December, 2024 11:23 GMT +05:30 - More infoProduct prices and availability are accurate as of the date/time indicated and are subject to change. Any price and availability information displayed on [relevant Amazon Site(s), as applicable] at the time of purchase will apply to the purchase of this product.)Discover more from The General Post
Subscribe to get the latest posts sent to your email.