
in case you’re into gaming, you have probably heard that building your personal gaming computer is higher than buying one pre-constructed. It’s no longer pretty much saving money—building a custom gaming laptop gives you greater electricity, flexibility, and a deeper expertise of how your device works.
Don’t fear if you’ve in no way completed it earlier than—this guide will stroll you through the manner step-with the aid of-step. by the cease, you’ll realize exactly the way to build your own gaming pc.
Why construct Your very own Gaming pc?
earlier than we soar into the how, here’s why constructing your own laptop is really worth it:
- better performance for your money
- Customizable components to suit your needs
- less complicated to upgrade in the destiny
- amusing and profitable gaining knowledge of enjoy
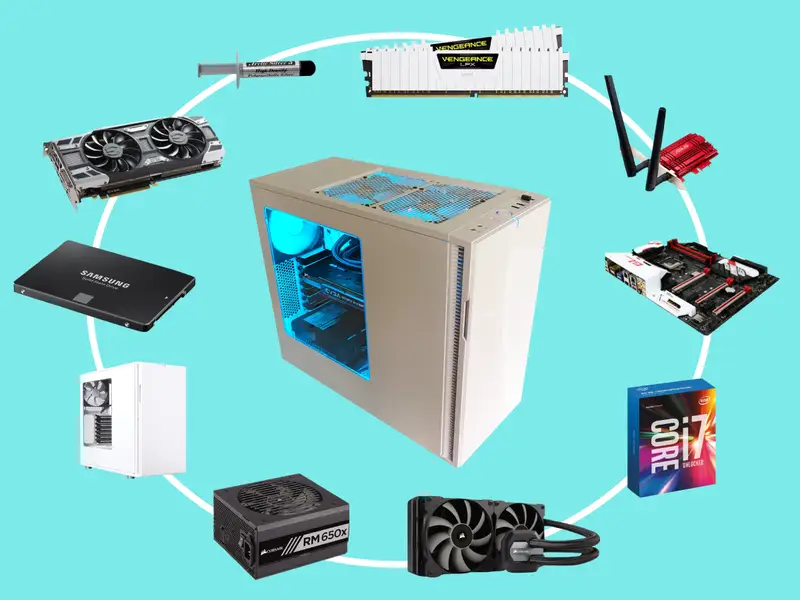
Step 1: pick Your additives
right here’s what you’ll want to buy:
- CPU (Processor) – The mind of your pc. choose one appropriate for gaming like an Intel center i5/i7 or AMD Ryzen 5/7.
- GPU (photographs Card) – The most vital component for gaming. search for something like an NVIDIA GTX or AMD Radeon card.
- Motherboard – Connects all your components. ensure it’s well matched with your CPU.
- RAM (memory) – 16GB is right for gaming.
- storage – SSDs are fast; get as a minimum 500GB, plus an optional difficult pressure for extra area.
- power supply Unit (PSU) – choose a dependable brand with sufficient wattage (round 600–750W for maximum builds).
- Case – Holds all of your elements. choose a length that suits your motherboard and has desirable airflow.
- Cooling gadget – most CPUs come with a cooler. you could additionally purchase aftermarket coolers or liquid cooling if needed.
- working machine (OS) – most gamers go with windows.
Step 2: collect equipment
You don’t want tons:
- Phillips-head screwdriver
- Anti-static wrist strap (non-obligatory, however endorsed)
- A clean, flat workspace
Step 3: assemble the computer
Take your time—this element’s a laugh!
1. install the CPU
Open the CPU socket at the motherboard, carefully place the CPU in the best orientation, and near the latch. Don’t force it!
2. set up the RAM
Push the RAM sticks into the RAM slots until they click in place.
3. install the Motherboard within the Case
Screw the motherboard into the case of the standoffs to avoid quick-circuiting.
4. install the strength supply
Mount the PSU in the case, typically at the bottom or pinnacle-again.
5. set up garage (SSD/HDD)
Screw the SSD or HDD into its slot and join it to the motherboard using SATA cables or M.2 slot if it is an NVMe SSD.
6. set up the images Card
Insert the GPU into the PCIe slot at the motherboard and secure it with screws.
7. connect All Cables
connect the power cables (to the motherboard, GPU, garage, and so forth.), facts cables, webkiks and case lovers. comply with your motherboard manual for exact places.
Step4: energy On and deploy home windows
Plug your display, keyboard, and mouse in, and power up the machine. If the whole lot is attached properly, your computer must turn on.
Insert a USB power with home windows and comply with the prompts to install the running gadget.
Step 5: install Drivers and video games
As soon as windows is mounted, deploy drivers to your GPU, motherboard, and different additives. Then, download your favored video games and start playing!
final suggestions
- Watch some video tutorials even as you build for extra steerage.
- Don’t panic if something doesn’t paint at first—test all your connections.
- hold your workspace prepared and your cables tidy for better airflow and easier troubleshooting.
conclusion
building your very own gaming laptop may seem intimidating, but it’s definitely achievable—even for novices. With a little endurance and the proper elements, you’ll have an effective, custom-built gadget that’s prepared to handle anything from informal gaming to high-stop AAA titles.
Read More:https://thegeneralpost.com/